If your garage door has been operating slower than usual or the remote control seems less responsive, it might be time for a LiftMaster garage door battery replacement. A sluggish garage door can be frustrating and inconvenient, particularly when you’re in a hurry. Fortunately, replacing the battery in your LiftMaster garage door opener is a quick and straightforward task that can restore your opener’s performance to its full potential.
This comprehensive guide will walk you through everything you need to know about LiftMaster garage door battery replacement. From identifying the signs that indicate your battery needs replacing to step-by-step instructions on how to perform the replacement, we’ll cover it all. By the end of this article, you’ll have the knowledge and confidence to replace your LiftMaster garage door battery quickly and efficiently, ensuring your garage door operates smoothly once again.
Understanding the Importance of LiftMaster Garage Door Battery Replacement
Why is the Battery Important for Your LiftMaster Garage Door Opener?
The battery in your LiftMaster garage door opener is a vital component that ensures the continuous and reliable operation of your garage door system. Many LiftMaster models are equipped with a battery backup system, which is particularly valuable during power outages. This feature ensures that you are not left stranded outside or inside your garage when there is a disruption in the main power supply.
Having a working battery is crucial not only for convenience but also for safety. In emergencies, such as severe weather or power failures, quick and secure access to your garage can be essential. The battery allows the garage door opener to function normally, providing peace of mind that you can access or secure your garage whenever needed.
However, like all batteries, the one in your LiftMaster garage door opener will degrade over time. As the battery ages, its capacity to hold a charge diminishes, which can lead to a range of issues. These issues can start subtly, such as a slower response time when opening or closing the door, and can escalate to more serious problems like the complete failure of the garage door to operate if the battery is not replaced promptly.
To maintain the high performance and reliability of your LiftMaster garage door opener, regular battery replacement is necessary. A fresh battery ensures the opener continues to function smoothly and reduces the risk of unexpected malfunctions that could disrupt your daily routine or compromise your safety.
Signs That You Need a LiftMaster Garage Door Battery Replacement
Knowing when to replace the battery in your LiftMaster garage door opener is crucial to avoid inconvenience and maintain optimal performance. Here are some key signs that indicate it’s time for a battery replacement:

- Sluggish Door Movement: If your garage door is opening or closing more slowly than usual, this could be a sign that the battery is losing its charge. A weakening battery might not supply enough power to operate the door at full speed, causing delays and potentially leading to further mechanical strain.
- Unresponsive Remote or Keypad: When the remote control or keypad starts responding inconsistently, it could be due to a failing battery. This can be particularly frustrating if you are in a hurry or if the garage door fails to respond at critical moments. Replacing the battery can help restore reliable functionality.
- Beeping Sound from the Opener: Many LiftMaster models have an audible alert system that emits a beeping sound when the battery is running low or needs to be replaced. If you hear a continuous or intermittent beep from the garage door opener unit, it’s a clear indication that the battery is nearing the end of its lifespan and requires attention.
- Flashing Indicator Lights: Some LiftMaster garage door openers have indicator lights that provide visual signals when something is wrong. If these lights start flashing or change color, it could be a sign of a low or malfunctioning battery. Consulting your owner’s manual can help you interpret these signals and determine the right course of action.
Regularly checking and replacing the battery in your LiftMaster garage door opener is a simple yet effective way to ensure your garage door remains reliable and functional. Ignoring the signs of a failing battery can lead to inconvenient and potentially unsafe situations. By staying proactive and addressing battery issues promptly, you can extend the life of your garage door opener and enjoy uninterrupted access to your home.
Step-by-Step Guide to LiftMaster Garage Door Battery Replacement
Preparing for the Battery Replacement
Before you start the LiftMaster garage door battery replacement, it’s important to gather all the necessary tools and materials to ensure a smooth process.
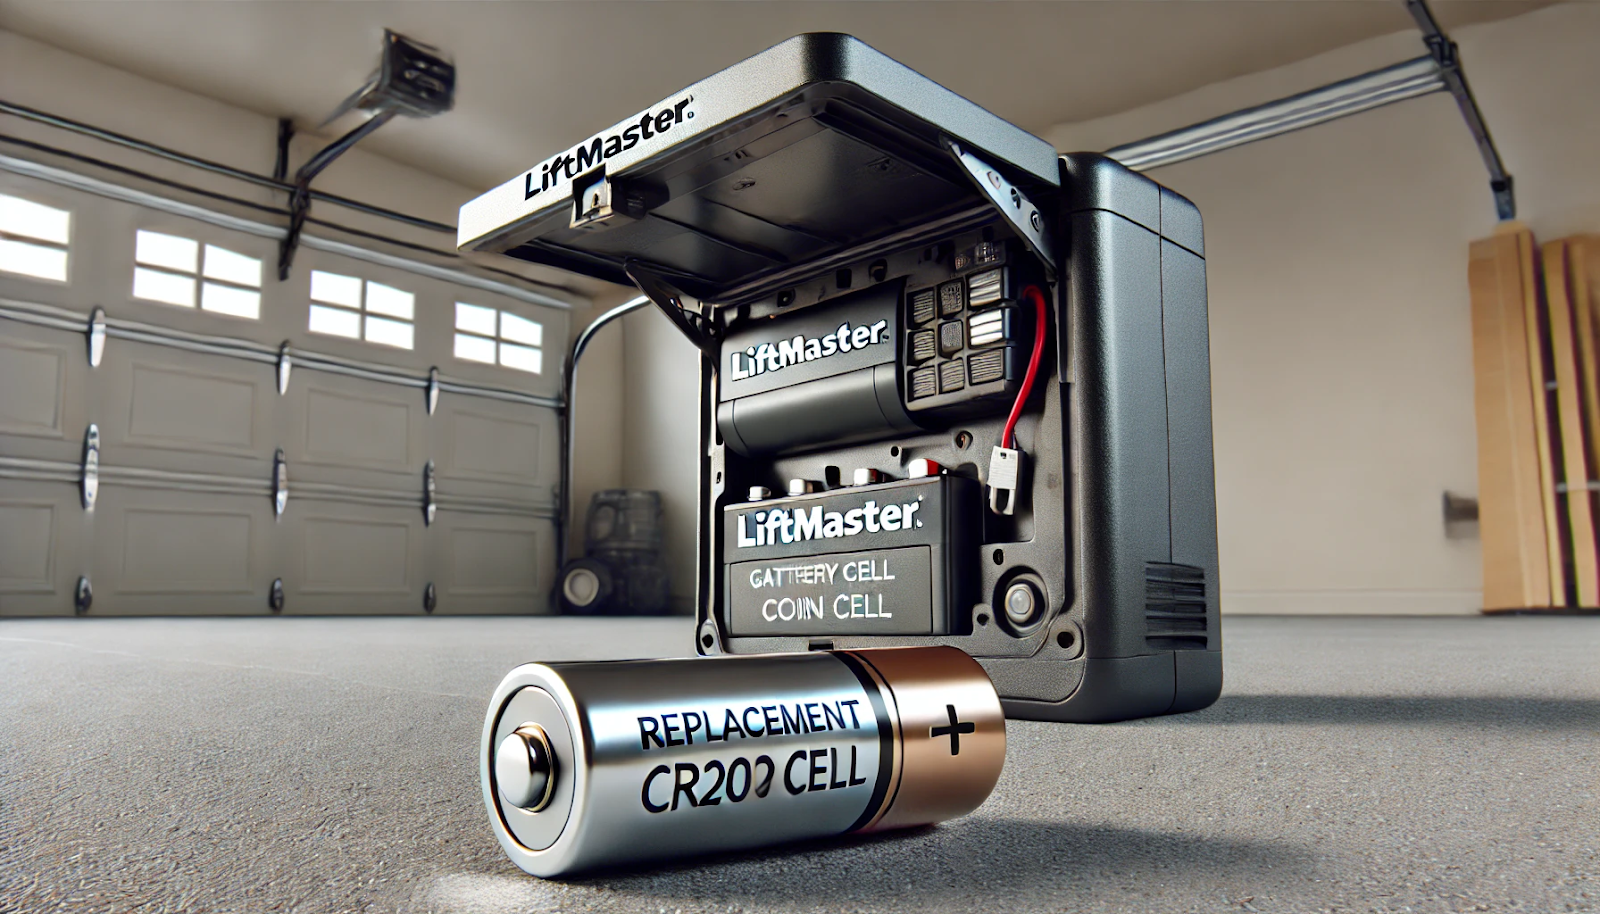
- Identify the Battery Type: Most LiftMaster garage door openers use a 12V, 4.5Ah or 5Ah battery. Check your owner’s manual or the label on the existing battery to determine the correct type.
- Purchase the Correct Replacement Battery: Make sure to purchase a battery that matches the specifications of your garage door opener. You can find these at most hardware stores or order them online.
- Gather Tools: You will need a screwdriver to open the battery compartment and possibly a wrench to disconnect the battery terminals.
How to Perform a LiftMaster Garage Door Battery Replacement
Once you have all the necessary tools and materials, you’re ready to begin the LiftMaster garage door battery replacement. Follow these steps to replace the battery in your garage door opener:
- Ensure Safety First: Before starting the replacement process, ensure that your garage door is fully closed. This prevents any accidents or injuries while working on the opener.
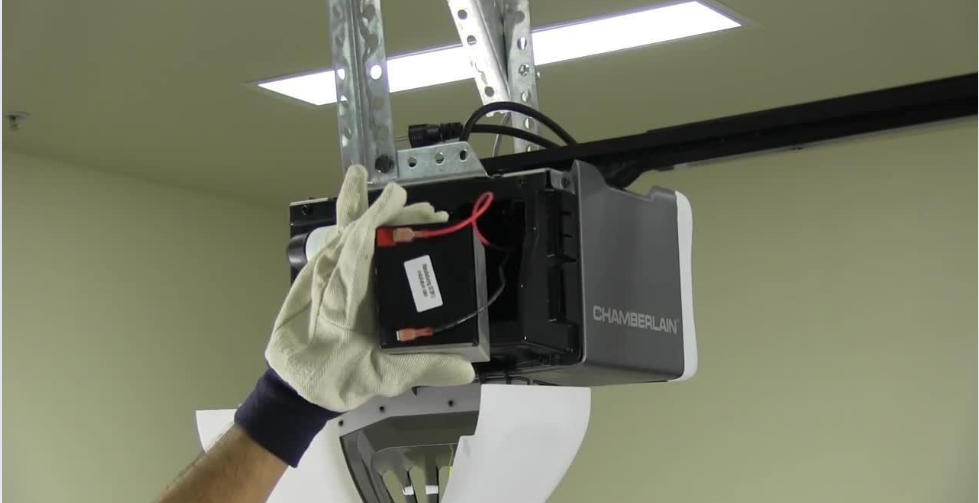
- Locate the Battery Compartment: The battery compartment is typically located on the side or back of the garage door opener motor unit. Refer to your owner’s manual if you are unsure where to find it.
- Open the Battery Compartment: Use a screwdriver to remove the screws holding the battery compartment cover in place. Carefully remove the cover to expose the battery.
- Disconnect the Old Battery: Before removing the old battery, note the orientation of the positive and negative terminals. Use a wrench to disconnect the terminals, starting with the negative terminal (usually black) followed by the positive terminal (usually red).
- Remove the Old Battery: Carefully lift the old battery out of the compartment and set it aside. Make sure to dispose of it properly according to local regulations, as it contains hazardous materials.
- Install the New Battery: Place the new battery in the compartment, ensuring it is positioned correctly. Reconnect the terminals, starting with the positive terminal followed by the negative terminal.
- Secure the Battery Compartment Cover: Once the new battery is installed, replace the battery compartment cover and secure it with the screws. Make sure the cover is properly aligned and secured.
- Test the Garage Door Opener: After completing the LiftMaster garage door battery replacement, test the garage door opener by using the remote control or keypad to open and close the door. If the door operates smoothly and the opener is responsive, the replacement is successful.
Troubleshooting Common Issues After Battery Replacement
Sometimes, even after a successful LiftMaster garage door battery replacement, you may encounter issues. Here are some common problems and their solutions:
- Garage Door Opener Still Not Working: If the opener is not working after replacing the battery, double-check the battery connections to ensure they are secure. Also, make sure the new battery is fully charged.
- Beeping Sound Persists: If the beeping sound continues after replacing the battery, the opener may need to be reset. Unplug the opener for a few minutes and then plug it back in to reset the system.
- Indicator Lights Flashing: If the indicator lights are still flashing, refer to your owner’s manual for specific troubleshooting instructions. It could be an indication of a different issue, such as a sensor problem or an obstruction in the door’s path.
Maintaining Your LiftMaster Garage Door Opener Battery
Regular Battery Inspections
It’s important to perform regular inspections of the battery and other components to ensure the longevity of your garage door opener and prevent the need for frequent LiftMaster garage door battery replacement.
- Inspect the Battery Terminals: Check the battery terminals regularly for signs of corrosion or loose connections. Clean any corrosion with a baking soda and water mixture and tighten any loose terminals.
- Check the Battery Voltage: Use a multimeter to check the battery voltage periodically. A fully charged 12V battery should read around 12.6 volts. If the voltage is significantly lower, it may be time to replace the battery.
Keeping Your Garage Door Opener in Top Condition
Regular LiftMaster garage door battery replacement, there are several other maintenance tasks you can perform to keep your garage door opener running smoothly:
- Lubricate Moving Parts: Apply a high-quality garage door lubricant to the chain, belt, and other moving parts to reduce friction and prevent wear.
- Inspect the Safety Sensors: Ensure the safety sensors are aligned and free of debris. Clean the sensor lenses with a soft, dry cloth to prevent false triggers.
- Test the Auto-Reverse Mechanism: Test the auto-reverse mechanism by placing an object in the door’s path and attempting to close it. The door should reverse upon contact with the object.
Extend the Life of Your Garage Door Opener Battery
To extend the life of your garage door opener battery and reduce the frequency of LiftMaster garage door battery replacement, consider the following tips:
- Avoid Frequent Battery Drain: Try to avoid frequent use of the garage door opener during power outages, as this can quickly drain the battery.
- Keep the Battery Charged: If your garage door opener has a battery backup system, make sure the battery is always fully charged. This will help ensure reliable operation during power outages.
- Store the Battery Properly: If you need to store a spare battery, keep it in a cool, dry place away from direct sunlight and extreme temperatures.
Frequently Asked Questions
What kind of battery goes in a LiftMaster garage door opener?
- LiftMaster garage door openers, particularly those with a battery backup system, typically use a 12-volt, 4.5-5 amp hour sealed lead-acid battery. It’s essential to check your specific model’s manual for the exact battery specifications as they can vary depending on the model.
How do I change the battery in my LiftMaster garage door?
- To change the battery in your LiftMaster garage door opener, first ensure your opener has a battery backup feature. If so, locate the battery compartment, which is usually at the front or back of the unit. Open the compartment, remove the old battery, disconnect the wires (taking note of how they are attached), connect them to the new battery, and securely place the new battery in the compartment. Close the compartment and test the opener to ensure it functions correctly.
How long does a LiftMaster garage door battery last?
- A LiftMaster garage door opener battery typically lasts 2 to 3 years, depending on usage and environmental conditions. It’s good practice to check the battery annually as part of regular maintenance.
How to take the cover off a LiftMaster garage door opener?
- To remove the cover from a LiftMaster garage door opener, you will typically need to locate screws or clips that hold the cover in place. These are usually found on the sides or the bottom of the unit. After removing these fasteners, gently pull the cover off. Be careful not to pull any wires that may become exposed when removing the cover.
How do I know if my garage door opener needs a new battery?
- Signs that your LiftMaster garage door opener may need a new battery include slower than usual operation, the opener struggling to lift the door, or the battery backup not functioning during a power outage. Most models also have an indicator light that signals when the battery is low, or you may hear a beeping sound indicating that the battery needs replacement.
Conclusion
Regular maintenance, including a LiftMaster garage door battery replacement, is essential for ensuring the smooth operation of your garage door opener. Following the steps outlined in this guide will allow you to quickly and easily replace the battery, ensuring that your LiftMaster opener continues to run efficiently. This simple maintenance task can significantly extend the life of your opener and maintain its reliability.
Remember to conduct regular inspections and maintenance to keep your garage door system in top condition. This not only prolongs the life of your battery and opener but also ensures reliable access to your garage at all times. DoorJam Garage Repair is here to help with all your maintenance needs, providing expert service to keep your garage door functioning at its best.
End Note
Discover DoorJam Garage Repair—your reliable partner for exceptional, affordable garage door services across Raleigh-Durham and beyond. Discover our commitment to quality and customer satisfaction on our About Us page. Whether you need a repair, a new installation, or just routine maintenance, our expert team is ready to help.
Check out our full range of Garage Door Services to keep your garage door in top shape. We serve a wide area, ensuring prompt and efficient service wherever you are. Elevate the look and functionality of your home with our diverse Garage Doors Collection, which includes the latest in durable and stylish doors.
If you’re considering an upgrade, our LiftMaster garage door openers offer the best in performance and ease of use. Have any questions or need to schedule a service? Just visit our Contact Us page. Start your journey to a better garage door today!